Maintaining your car’s engine health is paramount, and a critical component often overlooked is the engine filter. A clean engine filter ensures optimal performance and longevity of your vehicle. Understanding the importance of regular car engine filter replacement and performing it diligently can significantly improve fuel efficiency, reduce harmful emissions, and safeguard your engine from costly damage. Ignoring this simple maintenance task can lead to a cascade of problems, impacting everything from acceleration to overall engine lifespan. This article will delve into the nuances of filter replacement, offering insights you won’t find anywhere else.
Why is the Engine Filter So Important?
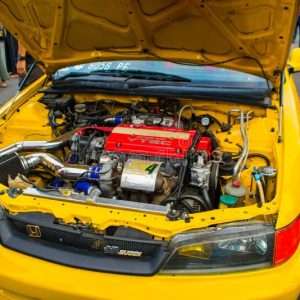
The engine filter, typically made of pleated paper or synthetic material, acts as the first line of defense against airborne contaminants. These contaminants, such as dust, pollen, dirt, and even insects, can enter the engine through the air intake system. Without a functioning filter, these particles would wreak havoc on sensitive engine components.
- Protecting the Engine: Prevents abrasive particles from damaging pistons, cylinder walls, and valves.
- Maintaining Airflow: Ensures a consistent and sufficient supply of clean air for combustion.
- Optimizing Fuel Efficiency: A clean filter allows the engine to breathe freely, improving fuel economy.
- Reducing Emissions: Proper filtration contributes to cleaner exhaust and reduces environmental impact.
When to Replace Your Engine Filter
While manufacturer recommendations vary, a general guideline is to replace your engine filter every 12,000 to 15,000 miles, or annually. However, several factors can necessitate more frequent replacements; If you frequently drive in dusty or polluted environments, or if you notice a decrease in fuel economy or engine performance, it’s wise to inspect your filter and replace it if needed.
Signs You Need a New Engine Filter:
- Decreased fuel efficiency
- Reduced engine power or acceleration
- Unusual engine noises
- Visibly dirty or clogged filter
- Check engine light illuminated
The DIY Approach to Engine Filter Replacement
Replacing your engine filter is a relatively straightforward task that many car owners can tackle themselves. Before you begin, consult your vehicle’s owner’s manual to locate the air filter housing and determine the correct filter type. Gather the necessary tools, including a screwdriver (usually Phillips head), a new engine filter, and potentially a shop vacuum to clean out the air filter housing. Remember to disconnect the negative terminal on your car battery before beginning.
The process generally involves opening the air filter housing, removing the old filter, cleaning the housing, installing the new filter, and reassembling everything. Ensure the new filter is properly seated and that the housing is securely closed. Once completed, reconnect the negative terminal and start your engine to verify everything is working correctly.
Here is a comparative table to show the advantages of DIY vs. Professional:
| Feature | DIY Replacement | Professional Replacement |
|---|---|---|
| Cost | Lower (parts cost only) | Higher (parts + labor) |
| Time | Requires personal time and effort | Faster, less personal involvement |
| Skill Level | Requires basic mechanical skills | Requires professional expertise |
| Convenience | Requires scheduling and performing the task | More convenient, service handles the task |
Choosing the Right Engine Filter
Selecting the right engine filter is crucial for optimal performance. There are many brands and types of filters available, ranging from standard paper filters to high-performance synthetic filters. Consider your driving habits and environment when making your selection. High-performance filters often offer improved filtration and airflow, but they may come at a higher cost. Ensure the filter you choose is compatible with your vehicle’s make and model.