Keeping your car clean is essential for both its appearance and its longevity. While many focus on the exterior‚ the engine bay often gets neglected. A clean engine compartment‚ however‚ not only looks better but can also aid in early detection of potential problems. Regular engine cleaning can prevent the build-up of grime‚ dirt‚ and debris‚ ultimately contributing to a longer-lasting vehicle.
Why Clean Your Engine Bay?
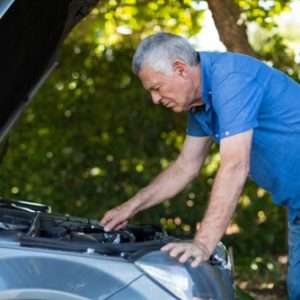
A clean engine bay offers several key advantages. Firstly‚ it improves visibility. A clean engine allows for easier identification of leaks‚ loose connections‚ or other potential problems. This proactive approach can save you money on repairs in the long run. Secondly‚ a clean engine helps prevent corrosion. Dirt and grime can trap moisture‚ leading to rust and damage to sensitive components. Regularly cleaning your engine bay helps to mitigate this risk. Finally‚ a clean engine simply looks better. A sparkling engine compartment reflects pride in ownership and can even increase your vehicle’s resale value.
Understanding the Risks
Before you start scrubbing‚ it’s crucial to understand the potential risks. Water and electricity don’t mix‚ so you must exercise extreme caution around electrical components. High-pressure washing can damage sensitive electronics and wiring. Certain cleaning agents can also corrode or damage parts if not used correctly. Preparation is key to avoiding these issues.
Preparing for an Engine Car Wash
Proper preparation is paramount for a successful and safe engine cleaning. This involves gathering the necessary supplies and taking precautions to protect sensitive components. You’ll need a selection of brushes (various sizes and stiffnesses)‚ degreaser‚ clean water‚ microfiber cloths‚ and potentially an engine degreaser specifically designed for automotive use. Always disconnect your battery’s negative terminal before you begin. This is a crucial safety step to prevent short circuits and potential damage to your vehicle’s electrical system.
- Disconnect the Battery: This is the most critical safety step.
- Gather Supplies: Ensure you have all necessary cleaning materials at hand.
- Protect Sensitive Areas: Cover sensitive electrical components with plastic bags or tape.
- Choose Your Degreaser: Select a degreaser appropriate for your engine type.
The Engine Car Wash Process: A Step-by-Step Guide
Now‚ let’s delve into the actual cleaning process. Remember‚ patience and meticulousness are key to achieving optimal results and avoiding damage. Start by applying your chosen degreaser‚ allowing it to dwell for a few minutes before scrubbing. Use low-pressure water to rinse thoroughly‚ avoiding high-pressure streams near sensitive electrical components; Pay attention to detail‚ cleaning every nook and cranny. Remember to avoid directing high-pressure water directly onto the alternator‚ distributor‚ or other sensitive parts.
Applying the Degreaser
Begin by generously applying the engine degreaser to the entire engine bay. Use a spray bottle or a suitable applicator to ensure even coverage. Allow the degreaser to sit for the recommended time specified on the product’s label. This dwell time allows the degreaser to break down and loosen the built-up grease and grime. The length of this dwell time will vary depending on the specific degreaser you use and the severity of the grime.
Scrubbing and Cleaning
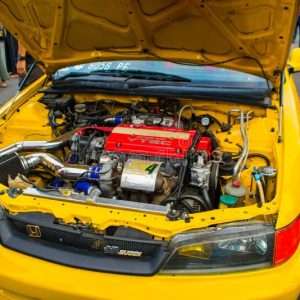
Once the degreaser has had sufficient time to work its magic‚ it’s time to start scrubbing. Use different brushes to access various areas. Start with larger brushes for broad areas and switch to smaller‚ more detailed brushes for hard-to-reach spots. Pay close attention to areas prone to grease buildup‚ such as around the valve covers‚ hoses‚ and engine block. Gentle but thorough scrubbing will remove the loosened grime and restore the engine’s cleanliness.
Rinsing and Drying
After scrubbing‚ it’s time to rinse the engine bay. Use a low-pressure spray nozzle or a garden hose set to a gentle stream. Avoid using a high-pressure washer‚ as this could damage sensitive components. Rinse thoroughly to remove all traces of degreaser and dirt. Then‚ use microfiber cloths to carefully dry the engine bay. This step helps to prevent future corrosion and keeps the engine looking its best.
Choosing the Right Cleaning Products
The market offers a wide variety of engine degreasers‚ each with its own advantages and disadvantages. Some are water-based‚ while others are solvent-based. Water-based degreasers are generally safer for the environment and less harsh on engine components‚ but they may not be as effective for stubborn grease. Solvent-based degreasers are more powerful but require more caution and proper disposal. Always read the product label carefully and follow the manufacturer’s instructions. Consider the level of grime you’re dealing with when making your selection.
- Water-Based Degreasers: Environmentally friendly and less harsh.
- Solvent-Based Degreasers: More powerful but require careful handling.
- Specialty Cleaners: Consider cleaners designed for specific materials or components.
Maintaining a Clean Engine Bay
Regular maintenance is key to keeping your engine bay clean. While a thorough cleaning might only be necessary every few months‚ regular spot cleaning can significantly reduce the buildup of grime. Wipe up spills immediately‚ and periodically use a detailing spray to remove light dust and debris. By incorporating these simple habits into your car care routine‚ you’ll significantly extend the time between major engine cleaning sessions.
Advanced Techniques and Considerations
For particularly stubborn grime or heavily soiled engine bays‚ you may need to employ more advanced techniques. Consider using a steam cleaner for a more thorough cleaning‚ but always exercise caution to avoid directing steam towards electrical components. For intricate areas‚ small detailing brushes or even cotton swabs can be invaluable. Remember‚ safety should always be your top priority.
Troubleshooting Common Problems
Even with careful preparation and execution‚ you might encounter some issues. If you notice any signs of electrical problems after cleaning‚ immediately disconnect the battery and consult a professional. If certain areas are particularly difficult to clean‚ you might need to use a stronger degreaser or more specialized tools. Don’t be afraid to seek advice from experienced detailers or mechanics if you’re unsure about any aspect of the process.