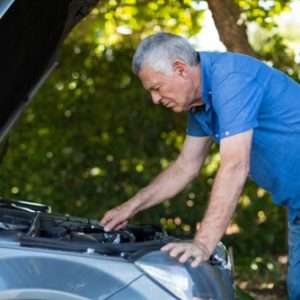
Your car battery has died, and now the dreaded check engine light is illuminated on your dashboard. This is a frustrating situation, leaving you stranded and unsure of the next steps. The simultaneous failure of your battery and the activation of the check engine light suggests a more complex problem than a simple dead battery. Don’t panic; this guide will walk you through potential causes, diagnostic steps, and solutions to get you back on the road safely.
Understanding the Interplay: Battery and Check Engine Light
The relationship between a dead battery and a check engine light is often more than coincidental. While a completely discharged battery can trigger the check engine light simply due to the loss of power, it frequently indicates an underlying electrical issue within your vehicle. The car’s computer system, which manages the check engine light, requires a consistent power supply from the battery. When the battery fails, it can disrupt this supply, leading to the light illuminating even before the battery’s complete depletion; This makes diagnosing the root cause crucial.
Possible Culprits Behind the Double Trouble
- Alternator Failure: The alternator is responsible for recharging the battery while the engine runs. A malfunctioning alternator will prevent the battery from recharging, eventually leading to a dead battery and the check engine light. This is a common cause of this dual problem.
- Parasitic Drain: An electrical component might be drawing power even when the car is off, slowly draining the battery. This constant drain can eventually deplete the battery, triggering the check engine light as the system loses power. Finding the culprit requires careful investigation.
- Faulty Battery: Sometimes, the battery itself is simply at the end of its lifespan. Although less likely to directly trigger the check engine light alone, a very weak battery can contribute to electrical instability, setting off the warning. Regular battery checks are essential for preventing such situations.
- Sensor Issues: Numerous sensors throughout your car’s engine communicate with the computer. A faulty sensor can send incorrect information, leading to the check engine light, and in some cases, increased electrical drain that weakens the battery.
- Wiring Problems: Damaged or corroded wiring in the electrical system can create short circuits, preventing proper charging and triggering the check engine light. Visual inspection of wiring is often a crucial step in diagnostics.
Troubleshooting Steps: A Systematic Approach
Before attempting any repairs, remember safety first. Always disconnect the negative terminal of your battery before working on any electrical components. Improper handling can lead to shocks or damage to your vehicle’s electronics.
Step 1: Jump Start and Check Engine Light Status
Attempt to jump-start your vehicle using jumper cables and another car’s battery. If the car starts, immediately check if the check engine light remains on. If it’s still on, the problem is likely more than just a discharged battery. This indicates the need for further investigation.
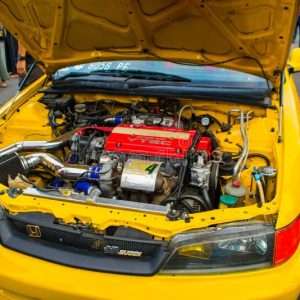
Step 2: Visual Inspection: Battery and Alternator
Inspect your battery terminals for corrosion. Clean them with a wire brush and baking soda solution if needed. Next, visually inspect the alternator belt for cracks or wear. A slipping or broken belt can prevent the alternator from charging the battery effectively. Ensure that all connections to the alternator are tight and secure.
Step 3: Battery Testing: Voltage and Cranking
Use a multimeter to test the battery’s voltage. A fully charged battery should show around 12.6 volts. If the voltage is significantly lower, the battery needs replacing. Also, test the cranking amperage to assess the battery’s ability to supply sufficient power during starting. A weak cranking amperage indicates a failing battery.
Step 4: Alternator Output Test
With the engine running, check the alternator’s output voltage. It should read around 13.5 to 14.5 volts. A lower reading suggests a faulty alternator, which is likely the root cause of the problem. A professional mechanic can perform a more comprehensive alternator test.
Step 5: Diagnostic Scan: Retrieving Trouble Codes
Use an OBD-II scanner to retrieve any diagnostic trouble codes (DTCs) stored in your car’s computer system. These codes provide valuable clues about the potential problems causing the check engine light. Consult a repair manual or online database to decipher the meaning of the codes.
Step 6: Parasitic Drain Test (Advanced):
This step requires some electrical knowledge. Disconnect the battery’s negative terminal and use a multimeter to measure the current draw. A significant current draw even with the car off indicates a parasitic drain. This might require further investigation to identify the faulty component.
Addressing the Root Cause: Repair or Replacement
Once you’ve identified the problem, the next step is to address it. This might involve replacing the battery, alternator, or other faulty components. Repairing wiring issues requires careful attention to detail and, in some cases, professional assistance.
Remember, attempting complex repairs without the necessary knowledge and tools can worsen the situation. If you are unsure about any step, it’s always best to consult a qualified mechanic.
- Battery Replacement: Replacing a car battery is a relatively straightforward process, but it’s crucial to follow the correct procedure to avoid damaging the electrical system.
- Alternator Replacement: Replacing an alternator is more complex and typically requires specialized tools. This is best left to a professional mechanic.
- Wiring Repair: Repairing damaged wiring requires identifying the source of the damage, replacing the affected section, and ensuring proper insulation to prevent future problems.
- Sensor Replacement: Replacing a faulty sensor may require specific tools and diagnostic procedures to ensure the correct sensor is replaced and the problem is resolved.
Addressing a dead battery and a check engine light simultaneously requires a methodical approach. By systematically eliminating potential causes, you can pinpoint the root of the problem and take appropriate action. Remember, safety precautions are paramount throughout the troubleshooting and repair processes. Taking the time for careful diagnosis will save you time and money in the long run. Preventative maintenance, such as regular battery checks and alternator inspections, can significantly reduce the likelihood of facing this frustrating combination of issues. Regular maintenance is a proactive way to keep your vehicle running smoothly and reliably for years to come. A well-maintained vehicle is a safer vehicle.