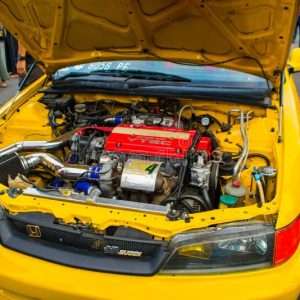
Why Clean Your Engine Bay?
A clean engine bay isn’t just about aesthetics. It’s about performance and longevity. Dirt and grime can insulate the engine‚ trapping heat. This can lead to overheating and reduced efficiency. A clean engine bay also makes it easier to spot leaks and other potential problems early on. Regular cleaning helps prevent corrosion and keeps components in good working order. It’s a simple task with significant benefits.
Gathering Your Supplies
Before you start‚ make sure you have everything you need. This will save you time and frustration. Here’s a list of essential supplies:
- Engine degreaser: Choose a product specifically designed for engine bays.
- All-purpose cleaner: For general cleaning and spot treatments.
- Soft-bristled brushes: Various sizes for different areas.
- Microfiber cloths: For wiping and drying;
- Garden hose with a gentle spray nozzle: For rinsing.
- Plastic bags or tape: To protect sensitive components.
- Safety glasses and gloves: To protect yourself.
Remember to read the instructions on all cleaning products before use. Safety first!
The Cleaning Process: Step-by-Step
Now‚ let’s get down to the cleaning process. Follow these steps for a sparkling clean engine bay.
Step 1: Preparation
Allow the engine to cool completely. A hot engine can cause cleaning products to evaporate too quickly and can be dangerous. Disconnect the negative battery terminal. This prevents accidental electrical shorts. Cover sensitive electrical components‚ such as the distributor‚ alternator‚ and any exposed wiring‚ with plastic bags or tape. This will protect them from water damage.
Step 2: Degreasing
Apply engine degreaser to the dirty areas. Follow the manufacturer’s instructions for application and dwell time. Use a soft-bristled brush to agitate the degreaser and loosen stubborn grime. Pay attention to areas with heavy grease buildup.
Step 3: Rinsing
Rinse the engine bay thoroughly with a gentle spray from your garden hose. Avoid spraying directly into electrical components. Make sure to remove all traces of degreaser.
Step 4: Cleaning
Use an all-purpose cleaner and a clean microfiber cloth to wipe down all surfaces. Pay attention to details‚ such as hoses‚ wires‚ and plastic trim. For tight spaces‚ use a small brush or cotton swabs.
Step 5: Drying
Dry the engine bay with clean microfiber cloths. You can also use compressed air to blow out any remaining water from hard-to-reach areas. Allow the engine bay to air dry completely before reconnecting the battery.
FAQ: Frequently Asked Questions
Can I use a pressure washer?
It’s generally not recommended to use a pressure washer directly on the engine bay. The high pressure can damage sensitive components. A garden hose with a gentle spray nozzle is a safer option. It’s much less likely to cause problems.
What if I get water in the distributor?
If you suspect water has entered the distributor‚ remove the distributor cap and dry it thoroughly. You can use compressed air to blow out any remaining water. Allow the distributor to air dry completely before reassembling.
How often should I clean my engine bay?
Ideally‚ you should clean your engine bay every 6 months to a year. This will help prevent the buildup of dirt and grime. However‚ if you drive in dusty or dirty conditions‚ you may need to clean it more frequently.
Final Touches
Once the engine bay is completely dry‚ inspect all components for any signs of damage or leaks. Reconnect the negative battery terminal. Start the engine and let it run for a few minutes to ensure everything is working properly. Enjoy your clean and shiny engine bay!
Choosing the Right Products
Selecting the correct cleaning products is crucial for a safe and effective engine bay cleaning. Not all degreasers and cleaners are created equal. Some can be harsh and damage certain materials‚ especially plastics and rubber. Always read the labels carefully and choose products specifically designed for automotive use.
Degreasers:
Look for degreasers that are biodegradable and non-corrosive. These are safer for the environment and less likely to damage your engine components. Water-based degreasers are generally a good choice. They are effective at removing grease and grime without harsh chemicals.
All-Purpose Cleaners:
Choose an all-purpose cleaner that is pH-balanced. This will prevent damage to painted surfaces and other sensitive materials. Avoid cleaners that contain bleach or ammonia‚ as these can be too harsh. A good quality car wash soap diluted with water can also work well as an all-purpose cleaner.
Protectants:
After cleaning‚ consider applying a protectant to the plastic and rubber components in your engine bay. This will help to keep them looking new and prevent them from drying out and cracking. There are many automotive protectants available that are specifically designed for this purpose.
Pro Tip: Test any new cleaning product on a small‚ inconspicuous area of your engine bay before applying it to the entire surface. This will help you to identify any potential problems before they become major issues.
Troubleshooting Common Issues
Even with careful preparation and cleaning‚ you may encounter some common issues. Here’s how to troubleshoot them:
Engine Won’t Start After Cleaning:
This is often caused by water getting into the ignition system. Check the distributor cap‚ spark plug wires‚ and coil for moisture. Dry them thoroughly with compressed air or a clean cloth. You may also need to apply a dielectric grease to the spark plug boots to prevent future problems;
Check Engine Light Comes On:
If your check engine light comes on after cleaning‚ it could be due to a loose electrical connection or a sensor that has been affected by water. Check all the connections you disconnected during the cleaning process. If the light persists‚ you may need to have the code read by a mechanic.
Streaks and Water Spots:
Streaks and water spots can be caused by hard water or cleaning products that haven’t been rinsed off properly. Use a water spot remover or a detail spray to remove these blemishes. Drying the engine bay thoroughly with microfiber cloths will also help to prevent them.
- Double-check all connections: Ensure everything is properly connected after cleaning.
- Use distilled water for rinsing: This can help prevent water spots.
- Consider a leaf blower: A leaf blower can be surprisingly effective at drying hard-to-reach areas.
Long-Term Maintenance
Keeping your engine bay clean is an ongoing process. Regular maintenance will prevent the buildup of dirt and grime and make future cleanings easier.
Regular Inspections:
Inspect your engine bay regularly for leaks‚ loose connections‚ and other potential problems. Addressing these issues early on can prevent more serious damage.
Spot Cleaning:
Clean up any spills or leaks as soon as they occur. This will prevent them from attracting dirt and grime.
Dusting:
Dust the engine bay regularly with a clean microfiber cloth. This will help to keep it looking clean and prevent the buildup of dust and debris.
Important Note: Always dispose of used cleaning products properly. Check your local regulations for proper disposal methods.
Advanced Cleaning Techniques
For those seeking an even deeper clean‚ consider these advanced techniques. These methods require more time and attention to detail but can yield impressive results.
Using Detailing Brushes:
Detailing brushes come in various shapes and sizes‚ perfect for reaching tight crevices and intricate engine components. Use them with your all-purpose cleaner to agitate dirt and grime in hard-to-reach areas. A soft-bristled brush is ideal for delicate surfaces‚ while a stiffer brush can tackle stubborn buildup.
Clay Bar Treatment:
A clay bar can remove embedded contaminants from painted surfaces in the engine bay. This is especially useful for removing overspray or stubborn stains. Lubricate the surface with detail spray and gently glide the clay bar over the area. Fold and knead the clay bar frequently to expose a clean surface.
Plastic Restoration:
Over time‚ plastic components in the engine bay can become faded and discolored. Plastic restoration products can help to restore their original luster. Apply the product according to the manufacturer’s instructions and buff with a clean microfiber cloth.
- Wear gloves: Protect your hands from harsh chemicals.
- Work in a well-ventilated area: Ensure proper ventilation to avoid inhaling fumes.
- Take your time: Rushing the process can lead to mistakes and damage.
Safety Precautions: A Reminder
Safety should always be your top priority when cleaning your car’s engine bay. Review these essential safety precautions before you begin.
Disconnect the Battery:
Always disconnect the negative battery terminal before cleaning the engine bay. This will prevent accidental electrical shocks and protect sensitive electronic components.
Avoid Direct Water Contact with Electrical Components:
Be extremely careful to avoid getting water directly into electrical components such as the alternator‚ distributor‚ and sensors. Cover these components with plastic bags or use a low-pressure spray nozzle.
Wear Protective Gear:
Wear safety glasses to protect your eyes from splashes and debris. Wear gloves to protect your hands from harsh chemicals and sharp edges.
Work in a Well-Ventilated Area:
Ensure proper ventilation to avoid inhaling fumes from cleaning products. Work outdoors or in a garage with the door open.
Warning: Never clean a hot engine. Allow the engine to cool completely before you begin cleaning.
Dealing with Stubborn Stains and Grime
Sometimes‚ despite your best efforts‚ you’ll encounter stubborn stains and grime that are difficult to remove. Here are some tips for tackling these challenges.
Baking Soda Paste:
For greasy stains‚ try making a paste of baking soda and water. Apply the paste to the stain‚ let it sit for a few minutes‚ and then scrub with a brush. Rinse thoroughly with water.
WD-40:
WD-40 can be effective at removing tar‚ grease‚ and other sticky residues. Spray WD-40 on the stain‚ let it sit for a few minutes‚ and then wipe with a clean cloth. Be sure to rinse thoroughly with water afterward.
Engine Degreaser Soak:
For heavily soiled areas‚ consider soaking the area with engine degreaser for an extended period. Follow the manufacturer’s instructions and be sure to rinse thoroughly with water afterward.
Professional Detailing:
If you’re unable to remove stubborn stains and grime on your own‚ consider hiring a professional detailer. They have the tools and expertise to safely and effectively clean even the dirtiest engine bays.