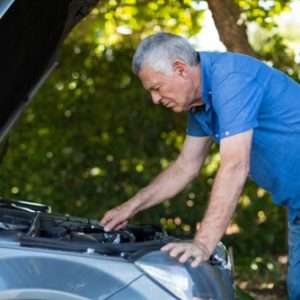
Engine swapping in Car Mechanic Simulator 2018 is a rewarding but complex process․ It allows you to significantly upgrade the performance of your vehicles․ This guide focuses specifically on swapping the engine in the Smith 1500․ It’s a popular choice for upgrades․
The Smith 1500, while a decent vehicle, can greatly benefit from a more powerful engine․ This guide will walk you through the steps․ Follow them carefully for a successful swap․
Preparing the Smith 1500
Before you even think about touching the new engine, you need to prepare the Smith 1500․ This involves removing the old engine and all its associated components․ It’s a messy job, so get your gloves on!
Steps for Engine Removal:
- Disconnect the Battery: Safety first! Always disconnect the battery before working on any electrical components․
- Drain Fluids: Drain the oil, coolant, and any other fluids from the engine․ Dispose of them properly․
- Remove Accessories: Take off the alternator, starter, air conditioning compressor (if equipped), and any other accessories attached to the engine․
- Disconnect Wiring and Hoses: Carefully disconnect all wiring harnesses and hoses connected to the engine․ Label them if necessary!
- Unbolt the Engine: Unbolt the engine mounts and any other bolts securing the engine to the chassis․
- Remove the Engine: Use the engine crane to carefully lift the old engine out of the engine bay․
Remember to keep all the bolts and parts organized․ You might need some of them later․ A well-organized workspace is a happy workspace․
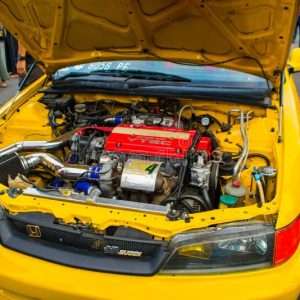
Selecting the Right Engine
Choosing the right engine for your Smith 1500 is crucial․ Consider the performance you’re aiming for and your budget․ Some engines are more powerful but also more expensive and require more modifications․
Factors to Consider:
- Horsepower and Torque: How much power do you want?
- Compatibility: Will the engine fit in the Smith 1500’s engine bay?
- Availability: Can you easily find the engine and its associated parts?
- Cost: Can you afford the engine and any necessary modifications?
Research different engine options and read reviews․ Don’t just pick the most expensive one! Sometimes a more balanced approach is better․
Installing the New Engine
Now for the fun part! Installing the new engine requires patience and attention to detail․ Take your time and double-check everything․
Installation Steps:
- Prepare the Engine Bay: Clean the engine bay thoroughly․ Make sure there are no obstructions․
- Install Engine Mounts: Install the correct engine mounts for the new engine․ You may need to purchase aftermarket mounts․
- Lower the Engine: Carefully lower the new engine into the engine bay using the engine crane․
- Bolt the Engine: Bolt the engine to the engine mounts․ Make sure the bolts are tightened to the correct torque specifications․
- Connect Wiring and Hoses: Connect all wiring harnesses and hoses to the engine․ Refer to your pictures and diagrams․
- Install Accessories: Install the alternator, starter, air conditioning compressor (if applicable), and other accessories․
- Fill Fluids: Fill the engine with oil, coolant, and any other necessary fluids․
- Connect the Battery: Reconnect the battery․
Post-Installation Checks and Adjustments
After installing the new engine, it’s crucial to perform thorough checks and adjustments․ This will ensure that the engine is running smoothly and efficiently․ Don’t skip this step!
Checks and Adjustments:
- Check for Leaks: Inspect all hoses and connections for leaks․
- Check Fluid Levels: Ensure that all fluid levels are correct․
- Start the Engine: Start the engine and listen for any unusual noises․
- Check Engine Performance: Monitor the engine’s performance using the diagnostic tools․
- Adjust Timing: Adjust the engine timing if necessary․
If you encounter any problems, consult a mechanic or online resources․ Don’t be afraid to ask for help!
FAQ ⎼ Frequently Asked Questions
Q: What tools do I need for an engine swap?
A: You’ll need a basic set of mechanic’s tools, including wrenches, sockets, screwdrivers, an engine crane, an engine stand, and a torque wrench․ Specialized tools may be required depending on the engine․
Q: How long does an engine swap take?
A: The time required for an engine swap varies depending on your experience and the complexity of the swap․ It can take anywhere from a few hours to several days․
Q: Can I swap any engine into the Smith 1500?
A: No, not all engines are compatible with the Smith 1500․ You need to choose an engine that fits in the engine bay and is compatible with the vehicle’s electrical system․
Q: Where can I find engines for swapping?
A: You can find engines at junkyards, online retailers, and specialty engine shops․ Be sure to research the engine’s condition before purchasing it․ It is very important to check the engine’s history․